
Old HP Server as Firmware Flashing Box
Using old HP DL380 G5/G6 to provide firmware flashing host.
STATUS: 4 Dec 2021 - Updated flashing box from DL380 Gen5 to DL380 Gen6, so adding Gen6 information.
If you have the retro-computing hobby, then at some point you are likely going to need to flash the firmware in a SCSI disk/tape, storage adaptor or network card at some point. And if you have a few computers you might need to do this more often than you like.
I have a used desktop PC with Adaptec card for SCSI devices and a "bread board" PC for PCI-e cards. These did not help when I got an LSI Logic 1068 based PCI-X SAS/SATA board that needed flashing before putting it into an SGI machine. Neither my existing machines had a PCI-X slot. The PC desktop is also sitting on shelf with monitor on top and is not easily accessble. So it was time to re-think my flashing ensemble ;-) .
What I wanted was a machine that could be used to flash: PCI, PCI-X and PCI-e based devices. As most of my retro stuff is either Macintosh or SGI related I can manage without ISA or EISA support.
Having worked with server machines, I found these to be much easier to open up and access and considerably more flexible with networking and storage. I currently have no physical Windows machines, instead running everything as virtual machines. So I decided that I should find an old server to be my tool of choice. Here is what I landed on.
Needs for Flashing & Testing Machine
Summary of needs:
- Support for the following cards / form factors:
- PCI - in its various guises and speeds up to
- PCI-X - for faster boards that can be installed in SGI machines
- PCI-e - for Nividia cards and so must have way to provide auxillary power wiring either by Molex or system board
2. Operating system support must include:
- MS-DOS - as some flashing tools are only available as DOS applications, but my prefernce is to use
- Ubuntu Linux - as many of more up to date flashing tools are now using Linux and finally as it is unavoidable some version of
- Windows - as again some tools are Window's based and a lot of firmware packing is via self extracting exe files and Windows comes in handy here. This could be any of XP, 7 or 10 depending on era of component and corresponding software tools.
3. Other things required:
- Bootable via CD or USB - my desktop PC is not bootable by USB, so I use PLOP/Smart Boot Manager in combination with flash based floppy emulation to manage this
- Can be used either diskless or with easily swappable 2.5" inch disks as I have a number of low capacity SSDs lying around with various OSes and things on them,
- Should have network interface or ideally two
- Must have firmware and other supporting software readily available for download
- Easy to find parts for machine
- BIOS and possibly UEFI booting and finally and most importantly
- MUST cost no more than AUD $150 including shipping.
The three most important needs being: well supported, with PCI-X slot and less than $150.
The Search for Candidates
Doing a quick google search for: "ibm server pci-x", "hp server pci-x" & "lenovo server pci-x", I got lots of hits for HP DL series machines. Quick further search homed in on HP DL380 Gen 5 as having a swappable PCI cage that can take either 2 x PCI-X + 1 PCIe adaptors or 3 x PCIe adaptors.
Further ebay scan for "hp dl380 g5" and "hp dl380 g5 pci cage" found that PC re-cyclers have an endless supply of HP DL380's and there was even a PCI-X Cage available for $50, while servers are available for $50 without disk.
To keep cost down I bought the cheapest server available for local pickup with a PCI riser cage in it. The listing did not indicate if PCI cage is PCI-e or PCI-X but price is sufficiently low that I take a gamble, as I can alway's get cheap PCI-X Cage seperately.
NOTE: HP DL380 G6 also has PCI-X riser board option, but these are typically at least $200 for machine. There is some advantage in terms of software currency and inbuilt support for PCI-e auxillary power cabling which make extra $$ worth it. I have now updated to DL380 Gen6 to get PCI-e cabling.
The Original Machine - Gen5
So $65 for DL380 Gen5 machine, which I picked up and immediately found had a PCI-e Cage, so needed to spend extra $49 on PCI-X Cage for total of $ 114 .
Machine has:
- 2 x 2 x Core Xeon (4 cores total),
- 6GB RAM,
- 1 x Power Supply,
- SAS / SATA disk controller,
- 2 x NIC, USB Ports,
- CD-ROM and
- slots for 8 x 2.5" inch disks with two carrier blanks and even a couple of 4GB Fibre Channel HBAs (that is what you get when you buy an old server from around 2008).
So with cash to spare I purchased 8 x Disk Caddies for $ 61.42 for grand total of: AUD $ 175.42. So I am 17% over budget, but could have been within budget if I had gotten fewer disk caddies. Only requirements not satisfied at this point is UEFI support (machine is too old for UEFI) and getting auxillary power to PCI-e GPU will require some mucking around, but there are a number of options including: pulling power from CD-ROM, adding special PCE-e power extract board, taking power from second (redudent power board) and various other ways..
Now comes the setup of machine, the software part which always has its issues.
NOTE: I sold old PCI-e flashing bread board computer and power supply for AUD $19.50 , so back on budget at around AUD $ 155.00 ;-) .
The Updated Machine - Gen6
When I first set up the DL380 Gen5 there was a big price difference between the Gen5 & Gen6 machines. As PCI-X was my most important priority and I believed I could "hack" a solution to get PCI-E auxillary power via the SAS/SATA card cage, I went for Gen5.
Twelve months on from initial Gen5 purchase and Gen6 machines are much cheaper. Not having had time to play around getting PCI-e power going, I decided to just swap the Gen5 for a Gen6 machine. So back to ebay, where I got a DL380 Gen6 with:
- 2 x 2.8 GHz Quad Core Xeon,
- 24 GB RAM,
- 2 x 146GB 10K RPM + 3 x 300GB RPM HDs and
- 2 x 750 Watt Power Supplies
all for AUD $100.
So I have swapped out the two SSDs from the old machine into the new machine and ordered a PCI-X Riser for this machine.
The PCI-e auxillary power cable has 10-PIN to 8-PIN and 6-PIN plugs and is available on www.moddiy.com.
I have documented additional findings in setting up the Gen6 in machine setup section below.
NOTE: Gen6 PCI-X Risers are more expensive than Gen5 ones and likely to cost as much as the machine, but this is countered by the PCI-E Riser having easy solution for Graphics Board power...
Original Machine Setup
Check list:
- Get documentation
- Verify booting
- Ensure BMC is setup & BIOS / Firmware is up to date
- Install OS
- Configure OS
- Do Flash Test
- Extra Bits
- Final Flash
- Adding HD and multi-boot
This is MVP for purchase where primary objective was to flash a PCI-X Storage board for use in SGI machine. So just need to get machine booting via USB, CD-ROM or USB Floppy to start and can add disk in later.
Step 1. - Get Documentation
One of advantage of getting HP, IBM, Lenovo machine is there support sites maintain support information for end of life products such as HP DL380 G5.
NOTE: HPE has now locked up a lot of its software, with need for a support contract to get access :-( . This seems very short sighted given that both Lenovo and Dell make this available without charge.
Step 2. - Verify Boot
Yep connect power, plug in USB keyboard and mouse (or PS/2 ones if you have them) and check the various BIOS options for machine, storage, IPMI/BMC configuration.
Boot shows it has a memory failure, but reports 8 GB RAM, not 6 GB (as advertised). To find faulty RAM I pull out all the sticks and load them back in a pair at a time using the doco, as memory has to be added as matched pairs in particular slot slot order. Machine has lots of memory options including: ECC, Mirror and Automatic Spare. So need to configure for ECC and find faulty module and then leave out faulty pair. So back to 6 GB as purchased and faulty pair put aside.
Now check boot from USB and CD via Ubuntu. All ok.
Step 3. - BMC & Firmware Check
Check BMC admin account again using documentation to set system board DIP switches to allow password changes. Find HP service pack details to ensure all onboard BIOS and Controller firmware is up to date.
HPE provides "HP Service Pack for Proliant", which includes a bootable ISO that run their "Smart Update Tool". More time was spent finding this via the HPE support site and google searches to get the release notes for updates to determine what was needed than running it. Generally newer versions require an HPE support account but some older versions are available free. For DL380 Gen 5 I used: SPP-2012.01.0-0.zip and SPP 2014.06.0 .
Now configure updated BIOS / Smart Controller Board and BMC settings once flashed to updated versions.
Machine is now updated and ready for OS install.
NOTE: There is also standalone ROMpaq for DL380 Gen5 released in 2015: SP73041.exe
Step 4. - OS Install
As machine has no disks in it still, the only easy OS install option is Linux install to USB. Linux provide no artificial barriers on what type of device it can be installed on, unlike Windows which requires you to jump through hoops to create a USB Drive based portable boot disk.
Keeping with retro-theme and fact that some of tools needed an older version, I went with Ubuntu 16.04 Desktop to try to keep kernel version compatability with LSI Logic (now Broadcom) flash utility.
Step 5. - Configure OS
Update Ubuntu with: cifs-utils, nfs-common (smb/cifs & nfs network disk access), openssh-server (to allow remote login/sftp to HP flash machine) and curl (to be able to fetch stuff).
HPE provide native Linux support tool which are available at: http://downloads.linux.hpe.com
The instructions on setting up repositories are not that clear, and finding utilities is a matter of browsing the repository, The provided tool does not add public keys for repostories, so apt update fails once HPE repositories are added.
See "Using HPE Linuyx Support Repository with Ubuntu" for details below.
As the DL380 includes HP Smart Array P400 you will need to use array configuration tool to manage storage. In my case this will means that any added disk should just be treated as passthrough (given purpose of machine, which is an infrequently used and mostly powered off utility host).
See "Installing HP SSA on Ubuntu".
Step 6. - Do Flash Test
Go to Broadcom Support site find required software.
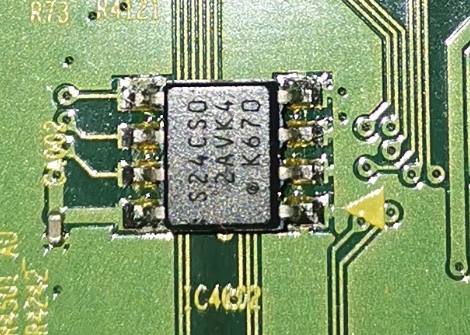
For target LSI SAS3442X-R board the following packages are candidates:
- SAS3442XR_P20_Supports_SAS_1-5G_3G_6G_and_SATA_1-5G_3G_HDD
- SAS3442XR_ Package_P21_IR_IT_Firmware_BIOS_for_MSDOS_Windows
- Installer_P19_for_Linux
The P19 for Linux provides Linux Tools and the P20 & P21 have the most recent firmware and bios.
The flashing tool is called "sasflash".
There is also a sas2flash for 6 Gb/sec cards and a sas3flash for 12 Gb/sec cards.
See "Past Echos the Future - Notes on SGI / IRIX Stuff" for information on specifics of LSI SAS3442X-R flashing.
Testing found that to cross flash the board requires that you erase the eeprom first and this require the MS-DOS flash tool. So I needed to set up MS-DOS support on box.
Step 7. - Extra Bits
Needing to move from Linux to MS-DOS. Approach was to use USB floppy disk drive and Virtual Machines. The virtual machine was used to create and test a bootable MS-DOS image.
I got my MS-DOS 6.22 version from old MS DevNet CD, which already had install floppy images and so once I had created required boot floppy with Oak Technology CD-ROM driver (see note on gcdrom.sys) courtesy of same DevNet CD pack, but this time from the Windows 3.1 installation. Once you have tested that VM machine boots from floppy then use "dd" to copy image to physical USB Floppy ("dd if=boot-image-with-cd-01.img of=/dev/disk2" on my Macintosh).
To be safe and as I was using floppy disk to boot MS-DOS, I also burnt a CD with various LSI drivers and DOS flash tools as there where too many to put on single floppy.
NOTE: For machines with SATA controllers and DVD-ROM, I changed cd-rom driver from Oak Technologies to GNU gcdrom.sys from FreeDOS
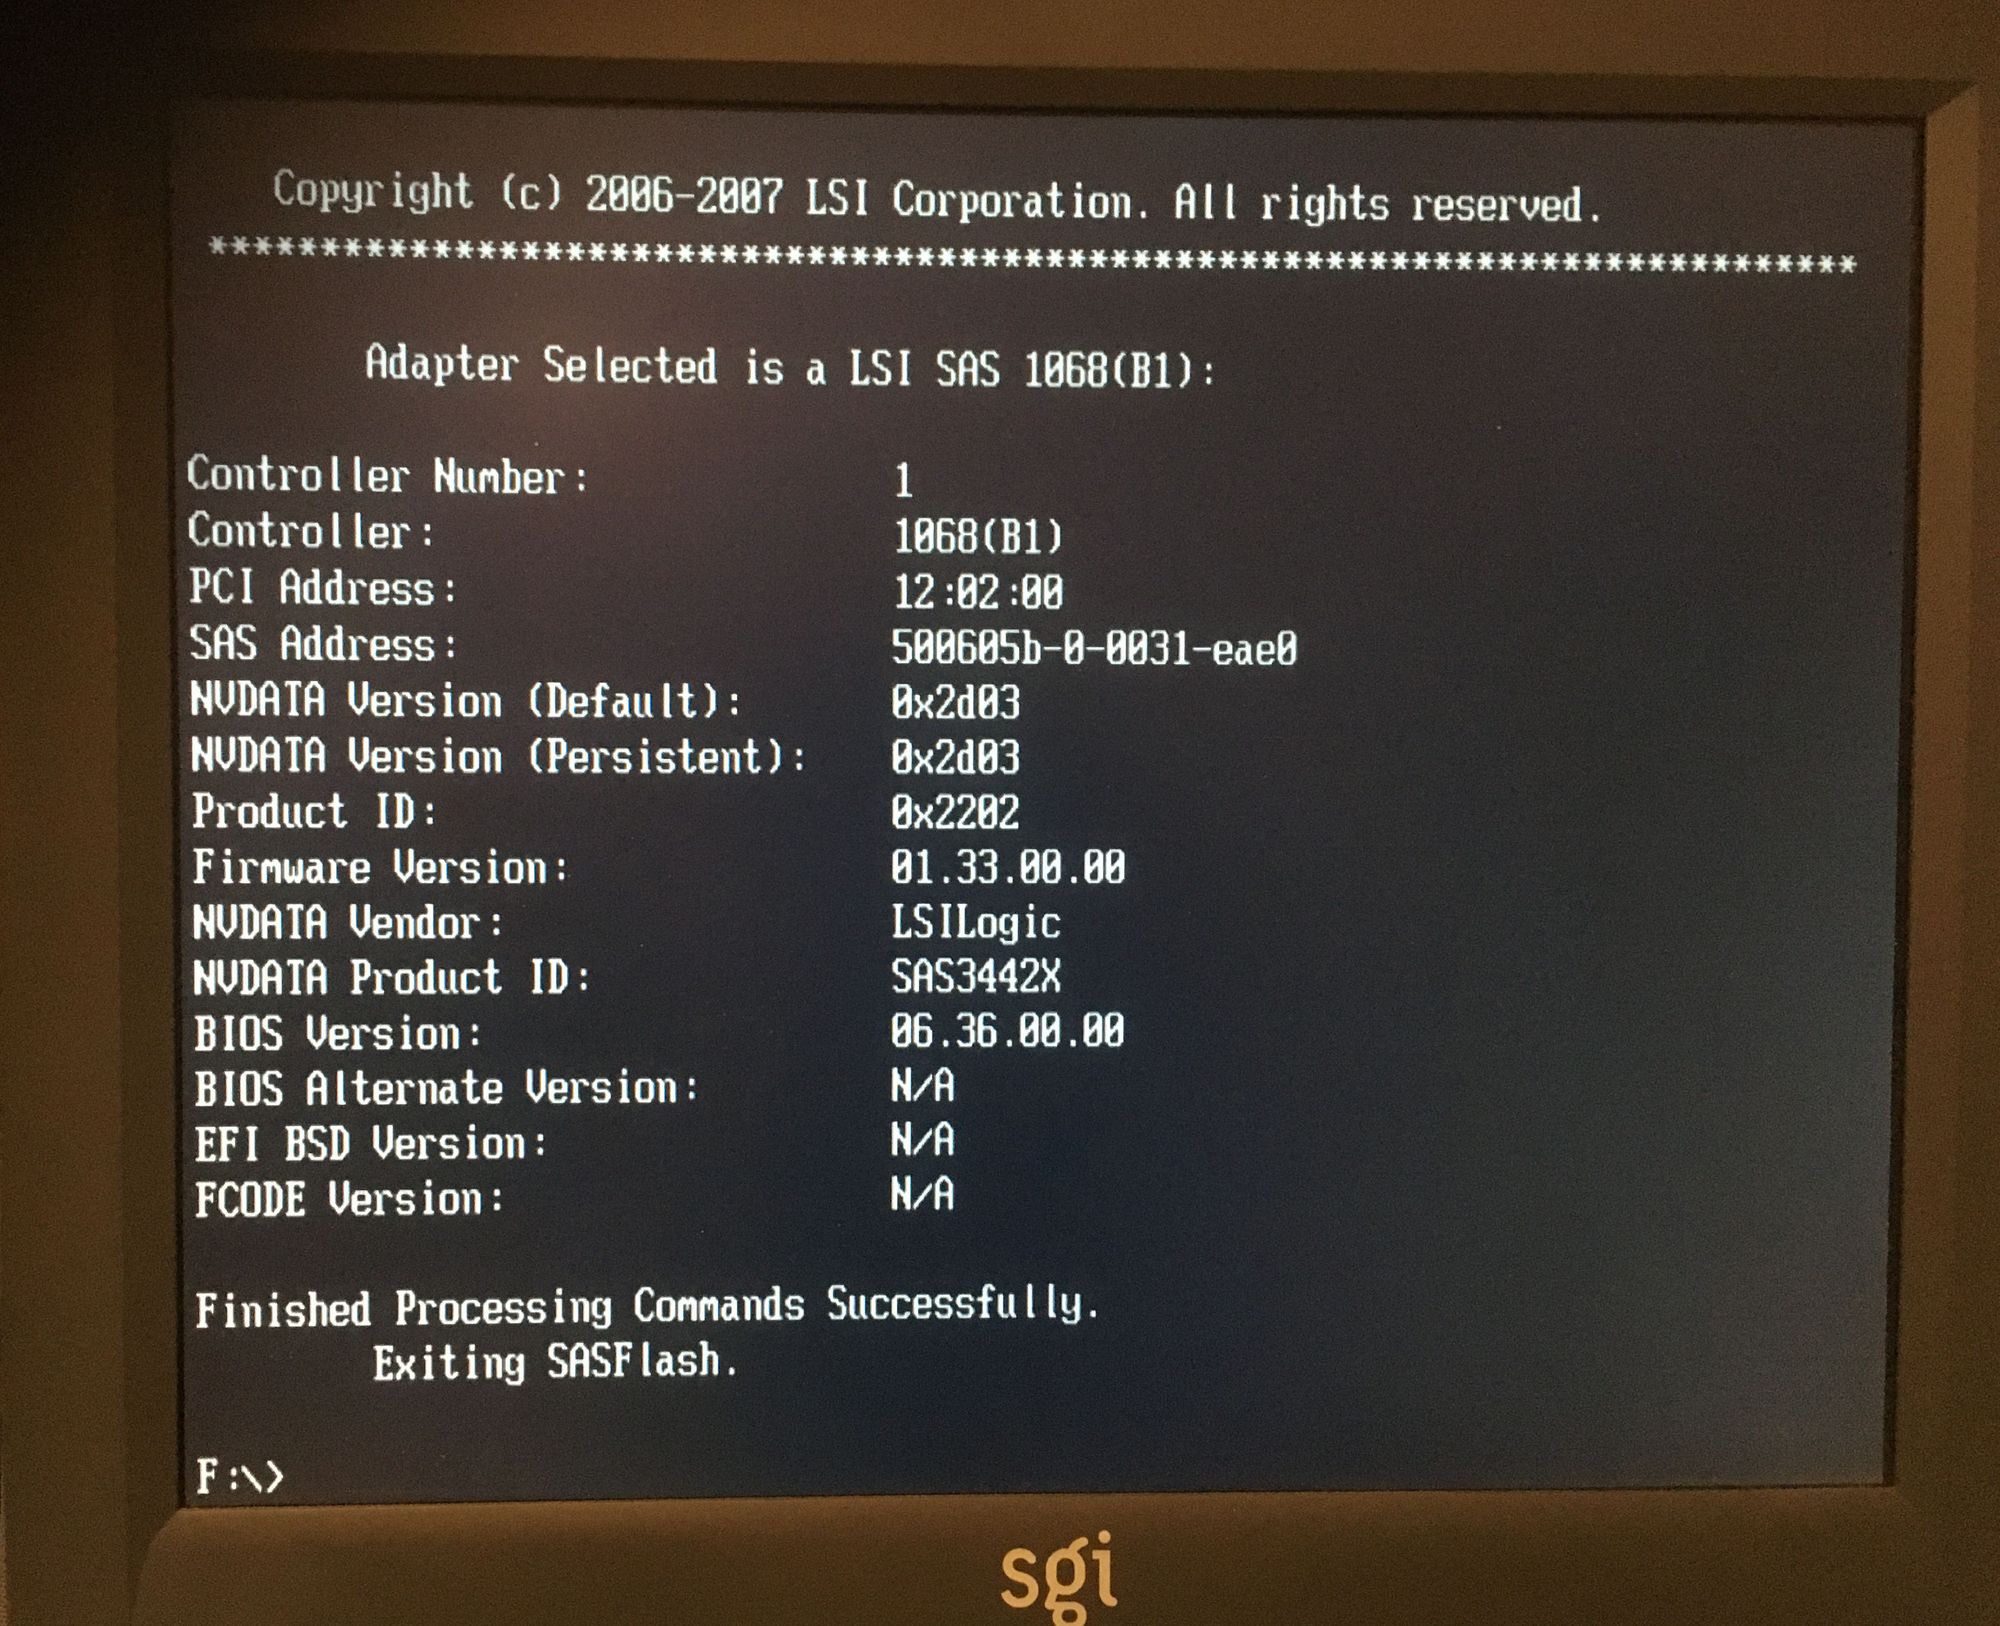
Step 8. - Final Flash
Reboot HP Flash Box via USB floppy.
Erase the eeprom and flash...
So quite a bit of work to get this far, but now it has been done once any further cases should be much simpler.
Step 9. - Add HD and Multiboot
To make things a bit faster and streamlined I added an HD (actually an 250GB Samsung SATA SSD). A little planning ahead is helpful here, as I know that I want to have MS-DOS and Ubuntu (minimum) and potentially some version of Windows in the future.
As this machine is BIOS based there are strict constraints on how disk must be setup to avoid having to play around with boot configuration.
For example:
- By default MS-DOS will boot from the first active FAT16 partition it finds
- Master Boot Record (MBR) partitioned disk can only have maximum 4 primary partitions (of which one must be active) and beyond that you need to add extended partition and logical partitions within this
- Installing MS-DOS to a partition after installing Ubuntu will definitely clobber the MBR Boot Sector, while installing Ubuntu after MS-DOS might clobber the MBR Boot Sector
- Linux likes to have 2 partitions, 1 for root file system and 1 for swap.
- MS-DOS is very sensitive to disk partitioning and has a bad habit of crashing when the disk is partitioned by non MS tools..
So strategy is: partition disk with MS tool (fdisk), install MS-DOS, use Ubuntu to add Ext4 and Swap partitions and install Ubuntu and finally configure grub for dual-boot.
To install MS-DOS I used boot floppy from Step 7 and the DevNet CD which had fdisk and format tools on it. This was pretty straight forward.
Next it was Linux install, via Live CD Boot and using gparted to add ext4 and swap partitions and then installing Ubuntu 16.04 into these. The Linux install did not recognise the prior MS-DOS install and so it replaced the MBR record with its own GRUB2 based one. Result was the first FAT16/MS-DOS partition was sitting on disk untouched and install did not result in automatically creating multi-boot with option of MS-DOS or Ubuntu.
So needed to add an additional boot menu item to GRUB2 and make this visible.
As the FAT16/MS-DOS partition was intact I need to add an MS-DOS boot menu option. So I edited "/etc/grub.d/40-custom" which is provided as a placeholder for additional custom menu. As I have put MS-DOS on the first partition on the first disk ("set root='hd0,msdos1'"), this makes the GRUB2 menu item nice and simple:
$ cat 40_custom
#!/bin/sh
exec tail -n +3 $0
# This file provides an easy way to add custom menu entries.  Simply type the
# menu entries you want to add after this comment.  Be careful not to change
# the 'exec tail' line above.
menuentry 'MS-DOS 6.22' {
  set root='hd0,msdos1'
  echo 'Loading MS-DOS 6.22'
  chainloader +1
}
Having added optional menu item you need to do an "update-grub" to rebuild the grub configuration, but before doing this edit "/etc/default/grub" looking for the line "GRUB_HIDDEN_TIMEOUT=0" which should be commented out as otherwise the GRUB2 menu will not appear on boot. Once this is done, do: "sudo update-grub" - this rebuilds all the grungee grub bits that previously had to be edited by hand.
Now I have dual-boot flashing machine, that might eventually be Windows bootable, but that is not currently needed. No doubt if and when I put Windows on same disk, it will again clobber the MBR boot sector again and require manual repair.
NOTE: This went smoothly except when I used non MS tools to partition disk. The results was when I run "fdisk" to setup initial MS-DOS partition, it keep crashing with an error: "run-time error R6003 - Integer divide by zero.". A search of google shows that this error has a certain notority, but the exact cause is not known. The only way I could get around this was by booting into Win95 MS-DOS 7 version (via floppy) and then using the fdisk command from this. Then I went back to MS-DOS fdisk and deleted partition created via Win95 MS-DOS 7 and created a fresh partition with MS-DOS 6.22 fdisk. So this was a bit of a dig a hole, then fill it in and re-dig it again, but with a different shovel... exercise.
Using HPE Linux Support Repository with Ubuntu
To use the HPE linux support tools, go to: http://downloads.linux.hpe.com
Now go the "Getting Started" page and download the "add-repo.sh" script.
This can be used to automatically add apt repositories for the the HP linux tools.
However the public keys for the repositories need to be added manually:
---
--- 1. get the add_repo.sh script and make sure it is executable
---

# sudo chmod a+x add_repo.sh
# sudo ./add_repo.sh mcp

---
--- 2. Add the public key for repository
---

# curl http://downloads.linux.hpe.com/SDR/hpPublicKey1024.pub | sudo apt-key add -
# curl http://downloads.linux.hpe.com/SDR/hpPublicKey2048.pub | sudo apt-key add -
# curl http://downloads.linux.hpe.com/SDR/hpPublicKey2048_key1.pub | sudo apt-key add -
# curl http://downloads.linux.hpe.com/SDR/hpePublicKey2048_key1.pub | sudo apt-key add -
# sudo apt update
Having configured the HP respository you will need to be able to see what is available for installation. I installed "synaptic" which provides a UI that you can use to see all the package based on their "origin".
On Ubuntu 16.04 (xenial/current) the packages are:
- amsd -
- hponcfg
- ssa - Smart Storage Admin
- ssacli - ssa CLI tool
- ssaducli -
The HP tool I was looking for was the HP Array Configuration Utility (ACU), but had no luck finding this in repository as it appears to have been removed and replace by HP SSA (see following).
Updates for DL380 Gen6
I got my DL380 Gen6 on eBay and immediately went to update it with last Service Pack for Proliant (SPP) (2017.04.0). So steps are:
Step 1. - Get SPP pack
For Gen6 this is 2017.04.0
Step 2. - Create USB Boot Key
Having found pack, first port of call was to get a copy of "HP USB Key Utility", which is used to write SPP to bootable USB Key. While the HP documentations says to use Version 2.0, I found that this version has been crippled to not work in virtualised environment. So I used version 1.7 which runs fine on Windows 7 KVM/QEMU VM.
Step 3. - Boot and Update Firmware
While this should be a painless single boot and restart the update fails when updating the HP Smart Array P410i adaptor. So you will need to work around this (see Step 4)
Step 4. - Work Around Smart Array Update Failure ...
The smart array failure is common to everyone who uses the SPP, but the proposed solution are all pretty hard to follow and overly complicated. The simple thing to do is:
- Create a bootable Ubuntu 18.04 Server disk (or USB Key), note is has to be Server as the desktop Ubuntu does not have the HP P410i Smart Array driver
- Get the required update from the SSP image or USB Key. The updates are in /hp/swpackages/hp-firmware-smartarray-14ef73e580-6.64-2.x86_64.rpm
- Install rpm2cpio: "sudo apt install rpm2cpio"
- Run rpm2cpio to extract the update files: "rpm2cpio hp-firmware-smartarray-14ef73e580-6.64-2.x86_64.rpm | cpid -id
- cd into directory from cpio: "usr/lib/x86_64-linux-gnu/hp-firmware-smartarray-14ef73e580-6.64-2"
- run the update command: "sudo ccissflash"
Step 5. - Apply the final BIOS ROM Update
While most of what you need is on the final SPP DVD, there is an additional ROM update that was released on 2018. This is available as a "ROMPaq" that can be run on Windows and will generate a bootable USB Key for installation (SP99323.exe).
Step 6. - Reset your DL380 Gen6 to defaults
As this machine has come from eBay, boot into BIOS Configuration menu (F9) and do a reset.
Step 7. - Pull disks out from old machine and put them into new one...
Having gone to trouble to create machine that can boot to: MS-DOS, Ubuntu & Windows 7, I am happy to report that once I accepted the disk from old machine to new machines via the Smart Array configuration menu and set up the right boot disk. I can boot up the Gen6 machine with no problems.
Installing HP SSA & ACU on Ubuntu 16.04
From the HP Support site:
"The HP Smart Storage Administrator (HP SSA) is a web-based application that helps you configure, manage, diagnose, and monitor HP ProLiant Smart Array Controllers and now other storage devices as well, such as host bus adapters (HBAs), HP Storage controllers, and future devices such as SCSI Express drives, and SAS switch devices. HP SSA replaces the existing HP Array Configuration Utility, or ACU, with an updated design and will deliver new features and functionality for various Smart Storage initiatives as they come online."
This is installable via snaptic but did not get found when using "sudo apt install ssa".
The HP/HPE software all get installed into "/opt" directory and does not appear to fully install correctly.
---
--- 1. Get HP ssa running
---

# cd /opt/smartstorageadmin/ssa/bin
# sudo chomd a+rx ssa*

---
--- 2. Run the tool (locally) which will bring up browser.
---      I found that it did not detect the P400 array...
---

# hpssa -local
This did not seem to find the array, so instead I did manual download (by looking directly in repository) of:
- cpqacuxe_9.40.2-2._amd64.deb
- hpsmh_7.6.1-9.1-1._amd64.deb
And dpkg install of these: "dpkg -i hpsmh_7.6.1-9.1-1._amd64.deb cpqacuxe_9.40.2-2._amd64.deb"
These will be installed in "/opt/compaq" and can be started/stopped by:
"sudo cpqacuxe -R" & "sudo cpqacuxe -stop"
When running you can connect via browser to: "http:/localhost:2301". As ACU requires root access you will need to enable the root account by setting the root password and then login via root.
MVP Flash LSI SAS3442X
Board was flashed via MS-DOS using the HP Flashing box. This test proved that MS-DOS still has its place the world of card flashing.
See "Past Echos the Future - Notes on SGI / IRIX Stuff" for more information specific to LSI SAS3442X.
Lesson here, be prepared and be willing to take alternate routes if needed and do this quickly. Do not wait for perfect, if MS-DOS and Floppy get a result then use then, and do not wait for disks and other things that would be nice but not necessary.
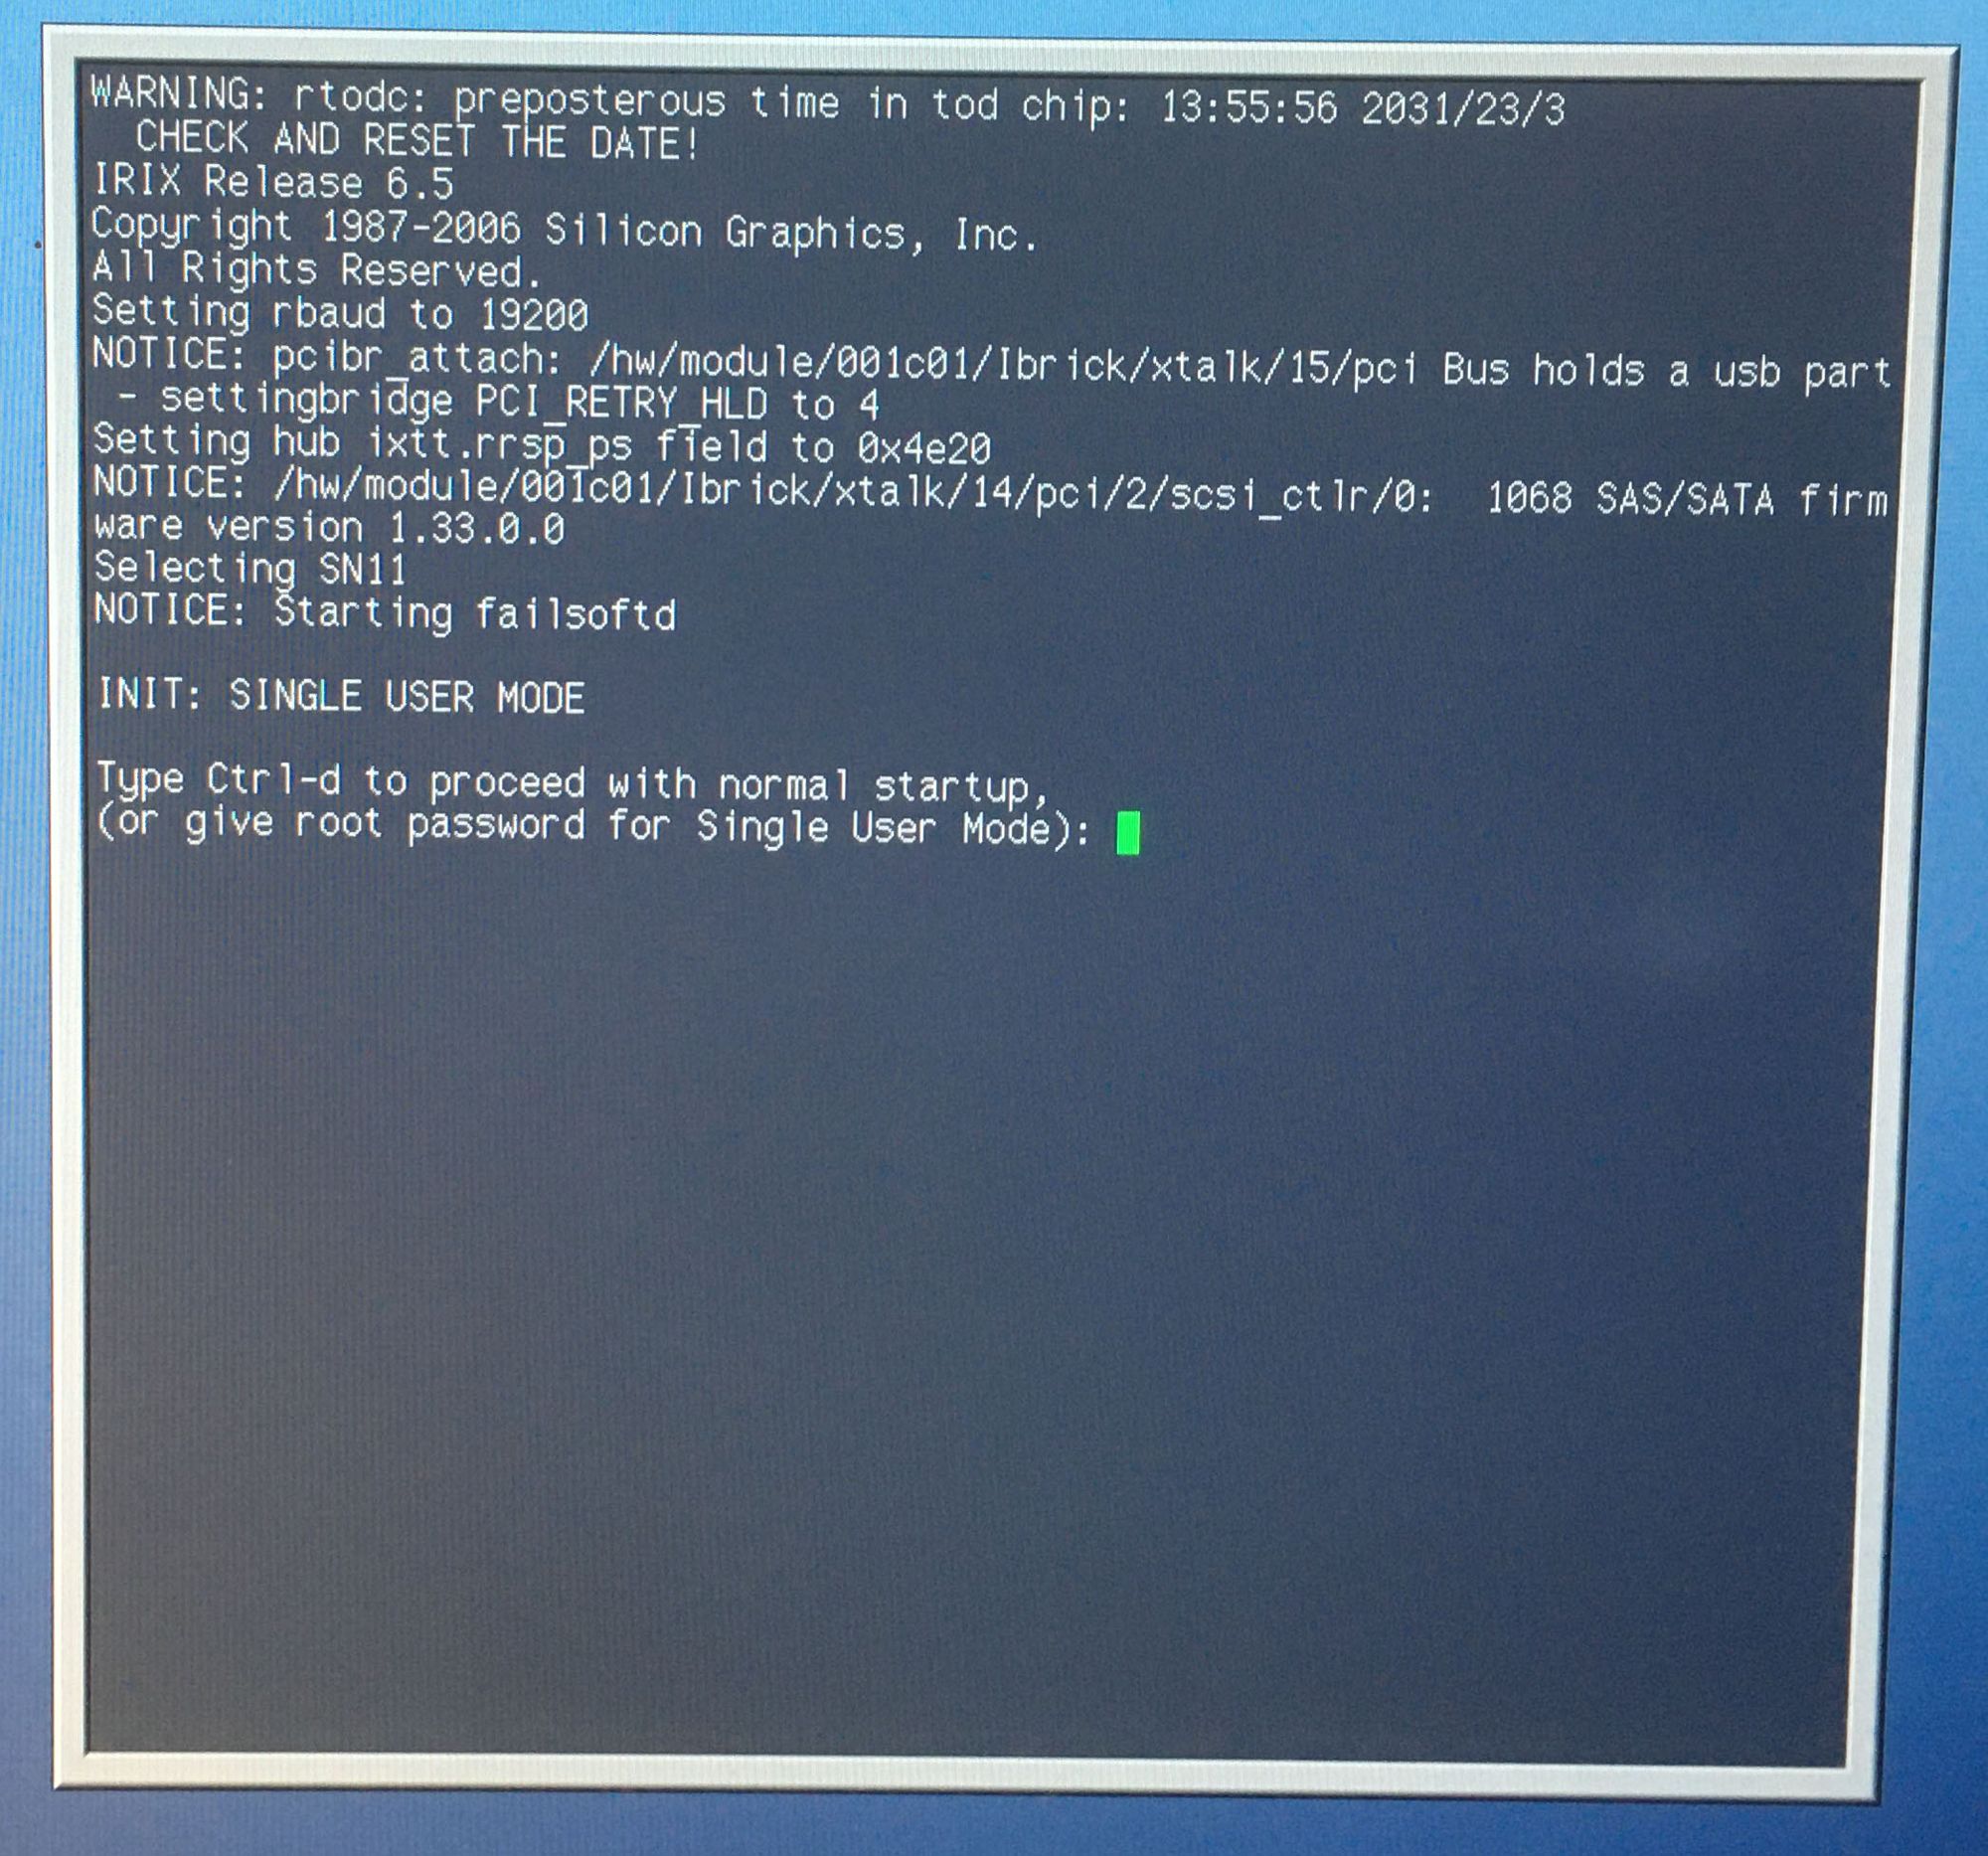
Once board was flashed via HP box it was removed and put into destination SGI machine.
Now to sell off the old flashing box via ebay to bring the HP server cost back to target budget of $150.
NOTE: There was a "Harvey Norman" insert in the paper this weekend and the cost of an new HP PC was around $1000. This is considerably more expensive and less versatile than my HP Flash setup.
Links & References:
HP DL380 Gen 5 - HP (now HPE) maintains documentation and software for its end of life products
HP Service Pack for Proliant - These are helpful to quickly bring your machine up to date, the ones to search for are:
- DL380 Gen5 - get SPP 2014.06.0 (there is also a BIOS update after this available from HPE),
- DL380 Gen6 - get SPP 2017.04.0 (again there is also a seperate BIOS update after this avilable from HPE)
IPMI / BMC - Intelligent Platform Management Interface / Baseband Management Controller is seperate out of band machine management interface that has it's own dedicated interface. For HP server this is know as iLO 2 (integrated Lights Out).
GPU Power in DL380 - here are various ways you can get auxillary power within DL380
GPU Power for DL380 Gen6 - require special 10-PIN to 8-PIN + 6-PIN cable, which is available on www.moddiy.com
HP Linux Repository Public Keys - are needed to do apt update and install HPE repository packages
HP Array Configuration Utility - was tool used to configure HP Smart Storage Controllers, I did not have luck with these instructions and ACU this has now been replaced by the HP Smart Storage Administrator (hpssa).
Old SGI Tips - motiviation for this was to get LSI SAS3442 board flashed for you on old SGI Fuel. I keep my tips on SGI/IRIX use and fixing here.
FreeDOS Archive - includes gcdrom.sys driver