
Running OpenVAS (GCE) Appliance / Greenbone Community Edition / Greenbone Security Manager TRIAL on KVM / QEMU
KVM/QEMU Machine Details for Greenbone GCE / GVM / GSM install.
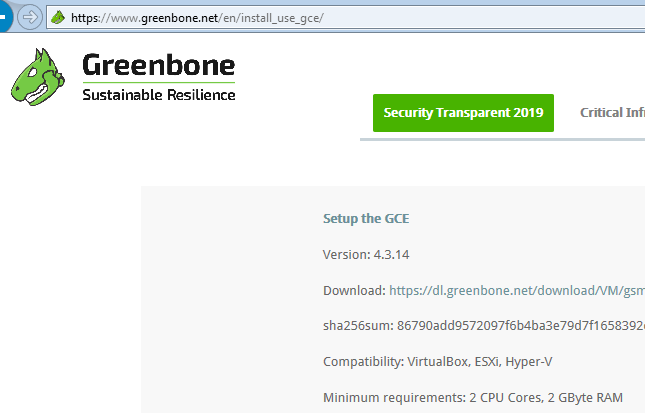
OpenVAS is widely used and valuable security scanning tool and an essential component for any one creating a public or private cloud infrastructure. The OpenVAS open source project is sponsored by "Greenbone Networks" and they make available a pre-packaged OpenVAS based VM Appliance as "GCE - GSM (Greenbone Security Manager) Community Edition". This is based on Debian Linux and designed run on any of : Virtual Box, VMWare ESXi or Microsoft Hyper-V.
But what about KVM (Kernal Virtual Machine), which provides core of most private and many public clouds ?
To get GCE Virtual Appliance running requires a bit of KVM / QEMU tickering, so to help people here are some guidelines taken from my working configuration.
Status: Dec 2020 - Updated for GSM TRIAL (based on Greenbone OS 20.08)
Status: Apr 2023 - Update to change to "use Kali Linux"
OpenVAS 9 is the end of line for OpenVAS and project has now been renamed "Greenbone Vulnerability Management" (GVM) with GVM-10 being released in 2019 and GVM-11 being current stable release.
With these changes there have also been changes in how the Greenbone Community Edition runs and so I have split out this into OpenVAS and GVM based guidance.
With the release of GVM 20.08 the Greenbone Community Edition (GCE) has been rename to "Greenbone Security Manager TRAIL". This is still Debian based and key change for it installation is need for EFI based boot. For KVM/QEMU, this means using OVMF (Open Virtual Machine Firmware) EFI.
At some point the "Greenbone Security Manager TRAIL" become unavailable and the Greenbone documented way to get going is to use the "Greenbone Community Edition" which requires source build. As an alternative to doing source build (which regularly does not work), there is the option to use Kali Linux which has Greenbone available as "apt" binary insall.
Kali Linux with GVM Package
There are now two ways to get Greenbone running in your local environment, via source build or do binary package based installation using Kali Linux.
As I want to use the simplest way that works and had lots of trouble getting source build going, I have opted to move to Kali Linux, which has Greenbone Vulnerability Manager" (GVM) available as binary install.
The Kali Linux documentation is very VMWare/Virtual Box/Microsoft Hyper-V focused for Virtualisation documentation. So I decided to start with (mostly) same Q35/OVMF VM configuration as per Trial edition:
- Hypervisor - KVM / QEMU
- Architecture - x86_64
- Chipset - Q35
- Firmware - OVMF (UEFI) - Ensure secure boot is disabled
- HD Type - Virtio HD (note I needed 100GB HD to allow copy of Kali pre-built VM, see "hack" below)
- CDROM - SATA (to boot 20.08 ISO from)
- Graphics - Video QXL (Virtio graphics fails)
- Keyboard - Generic PS2 Keyboard
- QEMU USB Tablet - Mouse
- NIC Device Model - Virtio
- CPU - x 2
- Memory - 4096 MiB
Make sure that the OVMF UEFI does not have "Secure Boot" enabled. If it does then you will not be to boot and hence install from the CD iso image.
Due to not having "Secure Boot" disabled, I used a hack work around when I found I could not boot from CD. This involved
- creating skeleton UEFI install using standard build Debian 11 install CD
- downloading Kali KVM/QEMU VM. This is build as BIOS bootable VM using MBR disk partitioning (not desirable and not compatible with modern machines).
- rebooting machine with Ubuntu with both Debian 11 UEFI install and Kali QEMU / KVM VM Image attached as disks
- running Ubuntu from CD, I used Gpartd to delete the Debian Ext4 and Swap partitions and copied the 80GB Kali install from MBR VM as new patition on Debian disk (this is why I had large 100GB HD image to allow space for copy). I then just used a bit of remaining space for small swap. Once you have copied over the Kala MBR Ext4 installation you can shrink the disk if you wish.
- to get this to boot I then disabled UEFI "Secure Boot" enable.
Subsequent to this I just did direct Kali install via CD iso by disabling "Secure Boot" (much simpler ;-) ).
NOTE #2: gvm puts all it files and runs in gvm user:group, so when running gvm install you can just "sudo su -" or get into root ("sudo su -") for the install (to avoid having to sudo all the time) and when running individual gvm commands (not scripts) use "runuser -u _gvm -- <YOUR-COMMAND>".
I have found that install appears to complete error free if you complete this from root, while using "sudo" result in a few problems.
Having Kali VM running just do:
- apt update/upgrade - "sudo apt update" and "sudo apt upgrade" and "sudo apt dist-upgrade -y"
- apt openvas/gvm install - "sudo apt install openvas gvm nsis"
- running gvm setup scripts - "gvm-setup" and "gvm-check-setup -h"
- get the feeds - "gvm-feed-update"
- start/stop gvm - "gvm-start =h" and "gvm-stop -h"
The process is documented with Kali GVM package. This was pretty painless, running "gvm-check-setup -h" guide you through the process and tells you want step needs to be completed next. here where a couple of other things that went wrong:
- Permission on log file which results is gvm startup failing - fix is to "chmod" the log files in: "/var/log/gvm/" to ensure that the gvm user account (for Kali this is underscore "_gvm:_gvm" <usr>:<group>) has permission to write to file. So check that ownership is with gvm user:group and then "chmod -R og+wrx /var/log/gvm"
- Feed complete but does not show up in UI - need to re-update feeds and potentially do feed rebuild: "runuser -u _gvm – greenbone-feed-sync --type SCAP" and you can also try "sudo -u _gvm gvmd -- rebuild && sudo -u _gvm gvmd -- rebuild-gvmd-data=all". I have also found that if you run "gvm-check-setup -h" once the install was complete then it will automatically kick off a feed update. If you then start gvm ("gvm-start -h") and then do "tail" on the log file you can see when the feed update is complete ("sudo tail -f /var/log/gvm/gvmd.log").
A properly build instance should show the "Scan Configs" under "Configuration/Scan Configs" menu item:
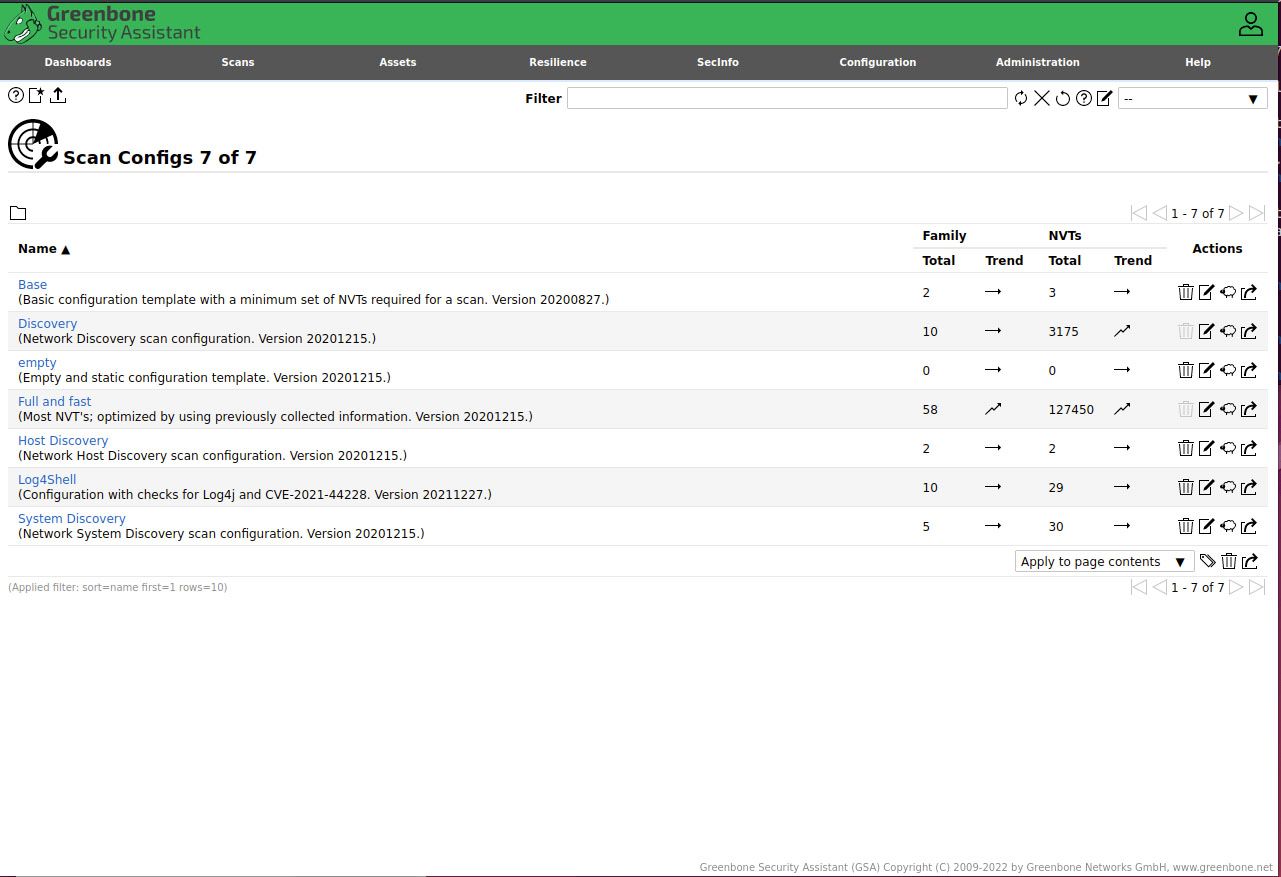
If this is empty then you will not be able to create new scan tasks and trying to save these will result in error message like "“Failed to find config ‘daba56c8-73ec-11df-a475-002264764cea'".
You might have to try to update feeds a couple of times...
Also if you forget your login password you can reset this using: "sudo gvmd --user=admin --new-password=YOUR-PASSWORD" or "runuser -u _gvm -- gvmd user=admin --new-password=YOUR-PASSWORD"
Summary:
Kali Linux install of GVM is pretty painless and comes with some additional benefits of have other useful scanning and security testing tools as part of its installation.
NOTE: See below for links to other guides.
GSM TRIAL Edition
With now renamed GSM TRIAL based version there is now only Virtual Box as documented installation.
The deployment model is now that you create an empty VM, which is booted via CD-ROM which then does install of CSM TRIAL to the hard drive.
This version does not allow enabling root (super user) on the installed machine. Configuration of networking (IP Addressing etc) is done via the captured shell script.
Key different from prior version is that you should now configure your VM to use EFI Firmware (ie OVMF for KVM/QEMU)
From this you can configure:
- User - accounts
- Network - static IP Addressing (ipv4 & ipv6, dns and default routes)
- Services
- Feed - the security feed
- Other things ...
The underlying OS has now been updated to Debian 10 (Buster)/Linux 4.19, now officially Greenbone OS (GOS) 20.08. There is now only SATA HD support and e1000 NIC support.
Here are QEMU / KVM configuration details:
- Greenbone Security Manager TRIAL (20.08) - based on Debian 10 (Buster)/Linux Kernel 4.19 (64-Bit) (or GOS 20.08)
- Hypervisor - KVM / QEMU
- Architecture - x86_64
- Chipset - Q35
- Firmware - OVMF
- HD Type - SATA HD (not HD must be at least 15GB
- CDROM - SATA (to boot 20.08 ISO from)
- No SCSI Controller Models work, I tested: lsilogic, lsisas1068, virtio
- Graphics - Video QXL
- Keyboard - Generic PS2 Keyboard
- NIC Device Model - e1000
- CPU - x 2
- Memory - 4096 MiB
GVM Based Edition
With GVM based CGE 6 there is no longer any Microsoft Hyper-V support, nor any official KVM / QEMU Support.
The deployment model is now that you create an empty VM, which is booted via CD-ROM which then does install of CGE to the hard drive.
This version of CGE is much more constricted then the prior OpenVAS version, for instance you cannot enable root (super user) on the installed machine. Configuration of networking (IP Addressing etc) is done via the captured shell script.
From this you can configure:
- User - accounts
- Network - static IP Addressing (ipv4 & ipv6, dns and default routes)
- Services
- Feed - the security feed
- Other things ...
The underlying OS has now been updated to Debian Linux 4.9 (prior OpenVAS release was 3.16). There is now only SATA HD support and e1000 NIC support.
Here are QEMU / KVM configuration details:
- Greenbone Community Edition (6.0.7) - based on Debian 9 (Stretch)/Linux 4.9 (64 Bit)
- Hypervisor - KVM
- Architecture - x86_64
- Chipset - Q35
- Firmware - BIOS
- HD Type - SATA HD (not HD must be at least 15GB
- CDROM - SATA (to boot 6.0.7 ISO from)
- No SCSI Controller Models work, I tested: lsilogic, lsisas1068, virtio
- Graphics - Video QXL
- Keyboard - Generic PS2 Keyboard
- NIC Device Model - e1000
- CPU - x 2
- Memory - 4096 MiB
OpenVAS 9 Based Edition
NOTE: This is not a set of step by step instructions, but rather the key configuration items that you must select to allow QEMU / KVM machine to run. In my case I manage most of my KVM's with "Virtual Machine Manager".
Here is information you need to configure QEMU / KVM machine:
- Greenbone Community Edition - based on Debian 3.16 64-Bit Linux (Jessie release)
- Hypervisor - KVM
- Architecture - x86_64
- Chipset - Q35
- Firmware - BIOS
- HD Type - SCSI HD (must be device 0:0:0:1)
- SCSI Controller Model - lsilogic
- Graphics - Video QXL
- Keyboard - Generic PS2 Keyboard
- NIC Device Model - e1000-82545em
- CPU - x 2
- Memory - 4096 MiB
The GCE Debian Linux distribution has been stripped out to remove superfluous drivers and other programs, so you will find that if you do not use the configuraiton as above then GCE will not find HD or you will not have any network interface available for scanning.
References & Links:
Greenbone Community Edition Documentation - the official source build documentation
Kali GVM Package - provides high level details on the Kali GVM package and the various scripts used to manage installation
Building on Ubuntu Instructions - lots of steps and the end result was not a running GVM installation, so I abandoned and went to Kali binary package
Some Kali GVM installation guides - this is happy days guide and this one has a some guidance should things not work as expected.
Kali Metapackages - use these to contain the scope of Kali installation
Convert Debian to Kali - script to convert standard Debian install to Kali